Final Result
The ManWorm TV
Over the past few months, Bayley and I have been working on the MANWORM TV. The MANWORM TV has a STM32F446RE microcontroller connected to an 4-bit resistor DAC and a buffer, for generating composite video signals. We have developed simple games (pong, racing, wolfenstein clone), 3D graphics (vector and raster), and even a program to play back video from an SD card (it once played back all of Star Wars Episode IV).
Here's what it looks like:
The NTSC video format is a series of horizontal scans, each approximately 63 microseconds long. Each line begins with a sync pattern and is following by the video data. A higher voltage indicates a brighter white. To generate the waveform on the microcontroller, an interrupt is configured to go off every 63 microseconds. The interrupt loops through all the pixels in the line and changes the output voltage. The timing between pixels is achieved by inserting a few NOP instructions - there are only a few hundred nanoseconds between pixels! There are two major drawbacks to this approach. To start with, drawing the full screen takes almost all of the CPU time, giving you no time to generate image data. In practice, I get around this by truncating lines early, giving you around 20 microseconds of free CPU time per line, and by having a more efficient way of generating the all-black lines that are offscreen and near the bottom. Notice that the Star Wars demo uses only a small fraction of the screen to be able to copy data from the SD card in time. You basically are required to use double-buffering, which uses more than half the RAM on the microcontroller.
The second drawback is that the amount of time it takes to enter the interrupt and load the ISR into icache can be somewhat variable, causing some weirdness. You can see this most clearly in the Star Wars video.
Gameboy Emulator
One day, I was bored and decided to try writing a gameboy emulator. One weekend and ~20 hours of programming later, I was playing Pokemon.
Part 1
The Gameboy CPU is custom, but similar to both the Z80 and the Intel 8080. It has an 8-bit accumulator register, a 16-bit stack pointer register, a 16-bit program counter, and 6 other 8-bit registers, which can sometimes be used in pairs as a 16-bit register. It has 8 kB of internal RAM, 8 kB of VRAM, as well as additional RAM and ROM in cartridge.
The first step to writing the Gameboy Emulator was to write the memory and cpu subsystems. There are several types of Gameboy Cartridges, which contain the game data, stored in (possibly multiple) ROM banks, as well as additional RAM. The memory system keeps track of which memory banks are currently mapped, and can do reads/writes of gameboy memory. The memory layout is roughly as follows:
- 16 kB ROM bank #0 (always mapped to this bank, contains Interrupt handlers)
- 16 kB switchable ROM bank
- 8 kB VRAM (stores tiles)
- 8 kB switchable RAM bank (cartridge RAM)
- 8 kB internal RAM
- Mirror of 8 kB of internal RAM
- 160 bytes of Sprite Attribute Memory (where each sprite should be)
- Various registers
- Fast Top RAM (used for stack)
- Interrupt Enable byte
In my first pass, I did not implement any of the registers and only implemented internal memory.
Next, I started writing the CPU emulator. The Gameboy has around 512 opcodes. 256 of them have a single byte indicating what the opcode is, followed by a few bytes of arguments. The remaining 256 opcodes start with byte 0xCB then have a second byte indicating the function. The CPU emulator I started with uses the following approach
- increment the DIV register (increases at 16 kHz)
- Read the opcode at PC
- Interpret the opcode at PC (does the function of the opcode, increments PC, increments the cycle count, which is different for different instructions)
Finally, I set up the video system emulator. It is updated after every single emulated instruction and is told how many emulated cycles have elapsed. The video system writes to the display line-by-line and is timed off of the CPU clock. I implemented a few of special registers which tell the CPU what line is currently being drawn.
After all this, I was able to partially emulate the Gameboy BIOS, which would normally display the nintendo logo. Without video, it was challenging to verify it was actually working, but I was printing each write to the video SCROLLY register, which showed that the CPU was decrementing this register to zero, waiting around a second, then attempting to jump out of the BIOS.
Part 2
The next step was to implement more CPU instructions, like the shifts, bit sets/clears/checks, fix a few bugs in setting various flag bits, and add in interrupts. When going into an interrupt, the address to return to is pushed onto the stack, and the PC jumps straight to the interrupt handler. There is a master enable/disable of interrupts accomplished with the EI and DI instructions, as well as an interrupt mask byte. The first interrupt I added was the V-Blank interrupt, which runs 60 times per second, when the video RAM is not being used by the display hardware and can be accessed. Here's what the main CPU step function looks like:
I also added a frame buffer and display window with SDL. It displays the framebuffer as an SDL texture. SDL was also used for reading the keyboard, which also triggers an interrupt. The Gameboy uses a scan matrix to determine which keys are pressed.
At this point, I also implemented the background render. The VRAM is filled with tile data, as well as a tile map, which tells you which tile should go in which spot. There are also SCROLLX and SCROLLY registers, which allow you to scroll the background around (it wraps!).
After a few issues with bit-shifting operations, I was able to get the following:

Notice that the (R) is a bit corrupt. This is because the Gameboy BIOS ROM I copied from the internet is slightly corrupted...
I was also able to run the "blargg CPU instruction test ROM", which showed that there were still many bugs in the CPU emulation and would crash before running all tests:

Part 3
In round 3 of Gameboy Programming, I fixed more CPU bugs, implemented some ROM bank mapping, implemented the DMA function, added the sprite renderer. This let me play Tetris, though the colors were still wrong:

I could also run the entire CPU instruction test without crashing the emulator, though several instructions still failed.
Part 4
After fixing a few more CPU bugs, implementing the HALT instruction (suspend until next interrupt), and adding the programmable timer, I was able to boot Dr. Mario. There were still a few bugs related to tile maps and sprite transparency that needed fixing:


Part 5
Next up was a rewrite of the ROM/RAM banking system to be more flexible. I finally revisited the graphics, fixing the tiles, adding the window renderer, and implementing palettes/transparency. Here's what the memory banking code looked like:
There were still a few small bugs, but it was good enough to start pokemon:
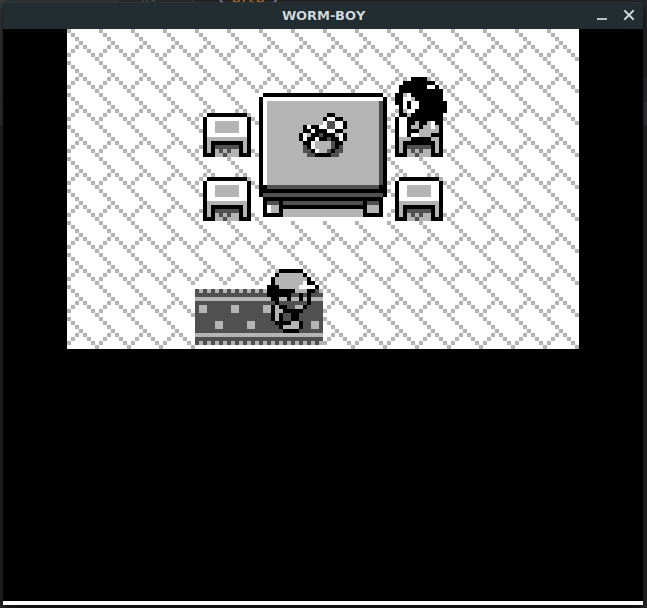
Part 6
Finally, Pokemon was working correctly. Here's the drawLine function, which draws a single line onto the screen:


This code is available on github from here:
https://github.com/dicarlo236/gameboy
It doesn't run every game, but seems to be pretty good with the games that it does. There are two known bugs with this version: The button reading emulation is slightly wrong, causing some games like Pokemon Green to have trouble and some of the video registers are wrong, causing the move CONFUSION in pokemon to get stuck forever.
Part 7 - On to the STM32F446RE!
The next step was to port the emulator to the microcontroller. I wrote the code knowing that I'd have to do this port, so it was pretty straightforward. From the beginning, it was clear that this would be a struggle - I needed to remove the bitmapped font in order to have enough memory to store everything. There were problems with both RAM and flash size - there simply wasn't enough flash storage to store pokemon red, and I didn't have enough RAM to do double buffering. Despite this, I got the gameboy code booting in around 20 minutes, though it was extremely slow. I implemented a number of tricks to speed up the game:
- Only output frames at ~10fps
- Improve the DMA and tile reading functions to be much faster (use memcpy instead of for loop which uses gameboy memory subsystem)
- Skip cycles when the CPU is in halt mode, but this does cause timing issues in some games
As you can see, the quality of the image is poor, and we are limited to running games which have a small ROM, small RAM, use the halt instruction, and are not CPU intensive. Tetris ran much slower.
Part 8 - Pokemon?
I spent a lot more time improving the speed of the emulator, mostly related to graphics and more intelligent cycle skipping. I was able to shrink some video buffers down in size to give me enough RAM for pokemon, but I did not have enough memory to store the game in flash. To get around this, I broke up the 1 MB ROM into a bunch of pages, then stored as many as possible of the most commonly used pages in flash. I then used the remaining 32 kB of RAM on the nucleo and an SD card to implement a caching system that would load in pages from the SD card as needed, then store them in the RAM cache until another page needed the same spot. I got the best performance when making the pages the same size as the SD card read block size. The best cache design used a hash table with a limited-length linear probing scheme, with LRU replacement (it did limited length linear probing, then replaced the entry least recently used in the probe). Unfortunately, there are simply some sequences in Pokemon which require tons of bank switches, meaning I need to read from the SD card incredibly often. Some basic timing calculations showed that it was unlikely pokemon would ever run at full speed using this technique, but it did work:
Part 9 - A Better Microcontroller
The solution to my speed problem is to switch to a better microcontroller. Bayley recently purchased some STM32H7 dev boards, which have a roughly 2x faster clock, and have enough flash to store all of Pokemon Red. However, this meant porting all of the Gameboy and NTSC video code from the MBED online compiler to the AC6 Workbench, learning how to do interrupts on the H7, and making another DAC out of some resistors and a random op-amp. I didn't know it at the time, but I was mistakenly programming the H7 in some sort of debug mode (even though I compiled with -O2...) which gave it around a factor of 3 decrease in performance. Even then, the performance improvement was huge. Pokemon was now much closer to real time (running at 60 fps!), and simple games like Mario Land and Dr. Mario were running at full speed! I also implemented the sound subsystem of the gameboy, and used a "1-bit DAC" (aka a digital output pin) to play back the music.
The sound was very bad, so I switched to the built-in DAC, which improved things a lot. There are a number of hacks to get the sound working (the arbitrary waveform is always a triangle, the noise channel is greatly simplified...) but the trick to getting a nice sound is to run the sound interrupt inside of the video interrupt. This only gives us 15 kHz sampling, but it's not the end of the world.
Here's a video showing the progression of the sound system, from absolutely terrible to halfway decent:
Part 10 - A better video routine
The H7 has a very fancy DMA system which Bayley realized might help with the video code. The idea is that you set up a timer to run at 8 MHz (this gives us 512 pixels per line) to clock the DMA output. The DMA can then be configured to output an entire horizontal line independently from the CPU, then trigger an interrupt at the end. This interrupt would then reload the DMA for the next line. Because the line-end interrupt happens at 15 kHz, we can also use it to compute the sound DAC output voltage and get reasonable quality sound. Getting the DMA up and running took most of a day, but the results were very good:
In this video, I am still running in the reduced performance debug mode, but you can see the "lag" counter which displays how many frames behind (or ahead, if it's negative) of real time we are.
Here is the DMA NTSC code:
Summary
In total, the project is 6,023 lines long, of which 1,515 are blank/comments and 4538 are actual code. The largest files are
- gb_cpu: 2,445 lines
- gb_mem: 678 lines
- gb_sound: 369 lines
- gb_video: 309 lines
I was wanting to do a gameboy emulator in a stm32 for a long time, but my lack of experience programming emulators always set me back.. I didn't even know where to begin. Great work btw!!
ReplyDeleteAmazing.
ReplyDeleteYou’re so cool! I don’t suppose I’ve read anything like this before. So nice to find somebody with some original thoughts on this subject. Really! Thank you for starting this up. This website is something that is needed on the web, someone with a little originality. Useful job for bringing something new to the internet!
ReplyDeleteNO$GBA Emulator
With this technique you can accomplish a quick and practical gaming PC fit to your own gaming needs. Other than setting aside a great deal of cash and having a productive machine, constructing your own gaming PC can likewise be a ton of fun.GamerBolt
ReplyDeleteIt's amazing. Huge technical analytics you have embedded here. I am not a coding expert or programmer but the technical description and coding explanation look very genius efforts. Also enjoyed the stars wars and composite video games. And finally thanks for taking your time to make the effort for speeding up the emulator. I can also wish to share a site link that is rich with game related information. gamesmobilepc
ReplyDeleteSuper excited having these gaming details. You have inserted many interesting and remarking info related the topic in the long details. I like it really and also pleased to embed a new social game site that also will be fun loving and appealing. 그래프사이트 This is the most popular graph site among the most popular graph game sites in Korea. Enjoy playing graph games without having to worry about the hash value without any mischief about the hash value. Go is recognized as a major player. There are only a few sites, but there are only three or four places that have a good reputation and popularity, and Nami recommends a number of graph game sites. But the results tell us which verification site the objective site is leading to. This is always a cash game graph game that recommends the best results. Thanks everything you did here.
ReplyDeleteWhat an enthusiastic gaming stuff! I got a huge thrill visiting this wonderful site. I really enjoyed the game boy simulator description and of course leave my hearty thanks for putting the coding details. 바둑이사이트
ReplyDelete